How to Staff Your Cannabis Processing Facility
We are often contacted by groups within the cannabis industry seeking to automate their cannabis processing facility and harvesting operations. One of the key questions they always ask is ‘What is the best way to staff an Automation Line?’. Specifically, they want to know:
- How many people do we need on the cannabis facility automation line?
- Who should be performing what tasks in the process?
- What is the best division of labor among cannabis processing functions?
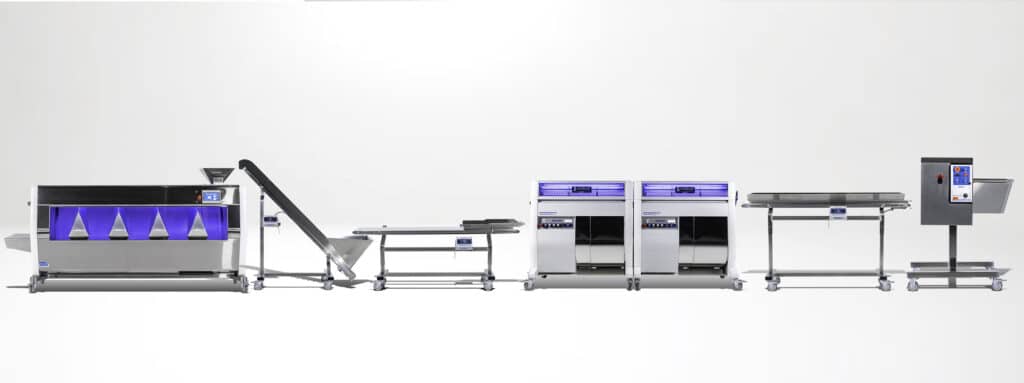
That’s why we’ve decided to create a breakdown of labor for a cannabis production team operating a complete automation line. This automation line includes machinery for bucking, trimming, and sorting. It also includes conveyors to transport cannabis material from one machine to the next.
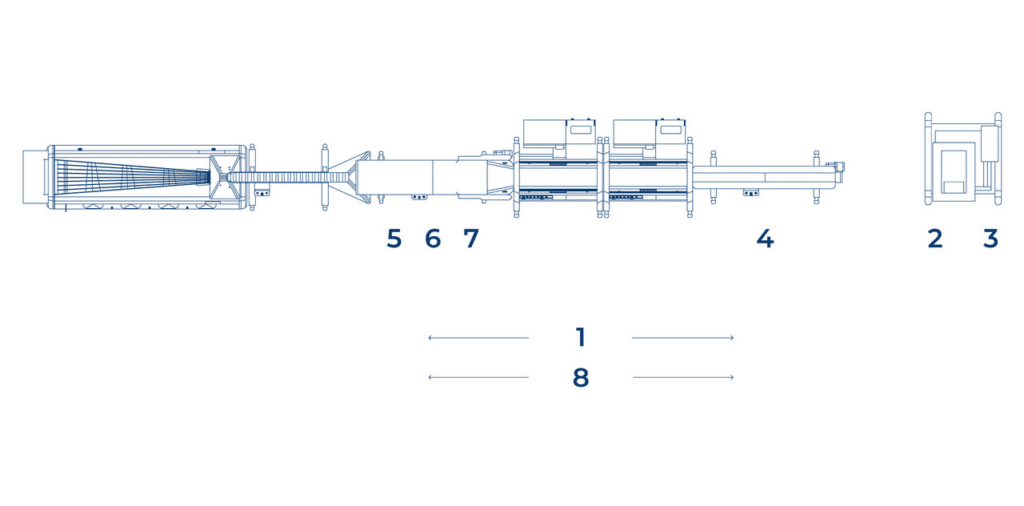
The Mobius Automation Suite
Mobius has the equipment to design an automated cannabis processing line for any cannabis business and cultivation facility. The Mobius Automation Suite includes the MBX Bucker, tandem M108S Trimmers, and the M9 Sorter. The Mobius conveyors then stitch everything together, automating the movement of the material.
We’ve outlined each cannabis processing function, the associated job, what they do in that position, and how experienced they should be. Though these are only suggestions, they are based on best practices for our current partners using Mobius processing equipment and can serve as a guideline for any cannabis processing plant.
Using the positions described below as a roadmap for allocating your resources will set you up to operate your automation line with maximum efficiency all while meeting or exceeding your processing quality goals.
Position 1 – Mobius Line Manager
This function is usually assigned to the most experienced member of the team. They have a thorough understanding of their organization’s standard cannabis processing procedures and workflows and a thorough understanding of the processing equipment. The Mobius Line Manager (MLM) supervises the entire team and the operation of the line. The Mobius Line Manager is typically responsible for setting and maintaining the pace of processing operations in the room, which is often dictated by the pace of bucked material being fed into the trimmers. At the start of the session, the MLM will adjust the controls and tilt angle on the trim line to achieve the correct level of trim at maximum throughput. Throughout the day, the MLM will be monitoring each station on the line to ensure things are running smoothly, there are no bottlenecks in the process, and the output at each step is meeting expectations.
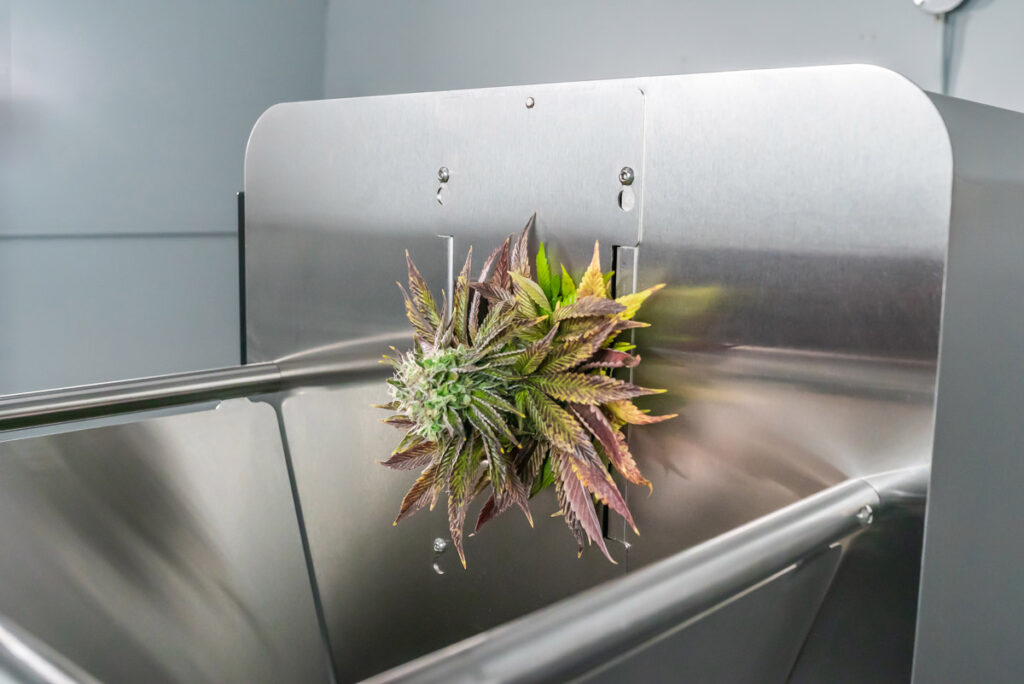
Position 2 & 3 – Bucking
The MBX Bucker can be fed by either one or two people simultaneously to strip the cannabis buds and leaves off the stalks. Production efficiency increases and processing times are faster when the unbucked stalks of the marijuana plants are all lined up in the same direction with the bottom four inches of stalk stripped and ready to feed into the machine. This position does not require a great deal of experience but, as with any task, training on how to properly operate the equipment and what results are expected is key. Note, in order to have enough bucked material to fill the trimmers to an appropriate level, the buckers usually need a head-start of approximately 20 or 30 minutes to build up this stockpile.
Position 4 – Trimmer Infeed
The team member positioned on the Infeed Conveyor of the trimmers has one of the most important jobs in the room, which means they should have a reasonable level of training and experience before being assigned to this station. The goal of the trimmer infeed is to feed the trimmer as consistently as possible, while also keeping an eye out for any extraneous items that should not be going through the trimmers (i.e. zip ties, plastic netting, gloves, etc.). Once the trim quality and throughput are established at the start of the day, it is the person assigned to the trimmer infeed who ensures that these results are maintained.
If additional staff are available, consider adding a second team member to the infeed side of the trimmer to assist in removing excess fan leaves if minimal de-leafing was performed prior to this step. This will increase your throughput and deliver a higher potency trim since you are not watering it down with low-potency leaves.
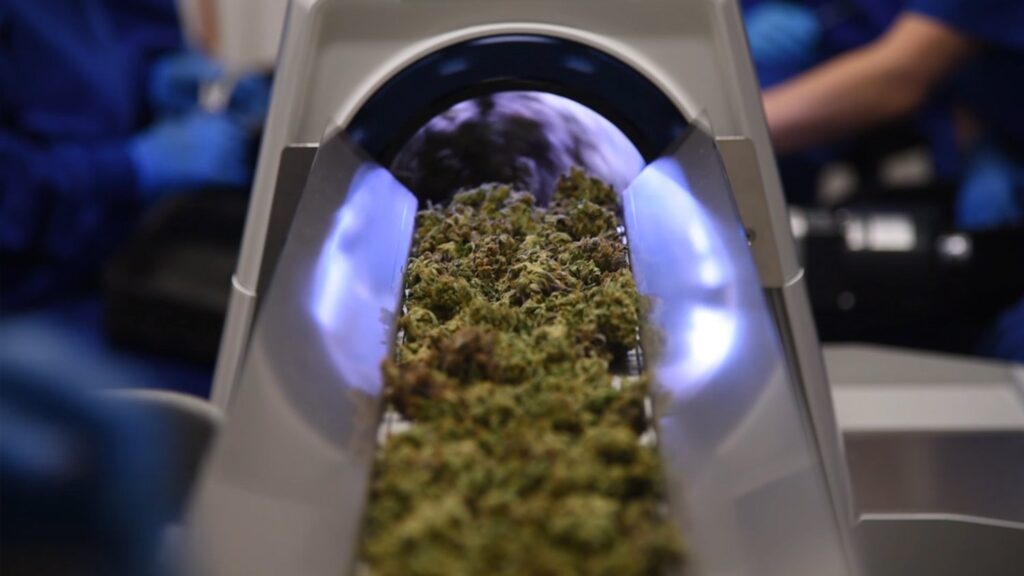
Position 5-7 – Trimming Quality Control
The number of resources assigned to the trimmer Outfeed Conveyor varies from site to site but typically ranges from two to four people. The Quality Control (QC) Technicians are seated in a staggered pattern on the outfeed side to perform a visual inspection of the trimmed flower, using handheld scissors to perform minor touch-ups (i.e. to remove crows’ feet), and to identify and separate any buds that show signs of mold or mildew, enabling you to manufacture the best quality cannabis products.
Although it is possible to have people with little to no experience working the QC line in your cultivation facility, it is strongly recommended that at least one person on QC has the skills and experience to train the other team members and monitor their performance throughout the day.
Position 8 – Runner
The runner is responsible for ensuring that each station has what they need and that bottlenecks are not created unnecessarily due to a lack of plant material or empty collection totes. For example, the bucking station requires a constant supply of un-bucked cannabis plant stalks and works to fill up two totes: one tote for the bucked flowers and leaves and one tote for the chipped stalks. The runner must stay on top of the movement of these totes down the processing line, replacing and moving things before there’s an issue. The runner is mobile, agile, and alert and has a very clear idea of the overall cannabis processing workflow in the room. Because of this, the runner is often an experienced resource. In some cases, the Mobius Line Manager will act as a runner.
Other Tips
People work most efficiently when they are excited and engaged. Consider cross-training all members of your team to perform all tasks within the processing room to help avoid fatigue in any particular position.
Optimizing your workflow and arranging the operation with one-way traffic is also essential. If possible, all personnel, totes of unprocessed plant material, and clean, empty totes should enter the space through one door, and everything should then exit through a different door. Whether you are preparing your raw material for extraction, or for medical marijuana use, having properly-trained staff assigned to the correct functions at your cannabis processing facility is essential. The configuration described above is a suggested workflow for our partners, or any cannabis production facility, operating at a high volume. Do you have a setup that is working well for you? Contact a Mobius expert today and share how you were able to optimize your cannabis facility design and team.


