Drive Belt Removal & Installation
Mobius M108S Trimmer
Drive Belt Removal & Installation
You may want to periodically replace the drive belt due to wear over time.
Step by Step
01

You'll need two tools. A torque wrench set to 16 foot pounds with a 7/32 socket hex drive and a tension tester.
02

First loosen the bolts around the motor gear, which is the gear on the bottom left. The motor is held in place by these bolts.
03
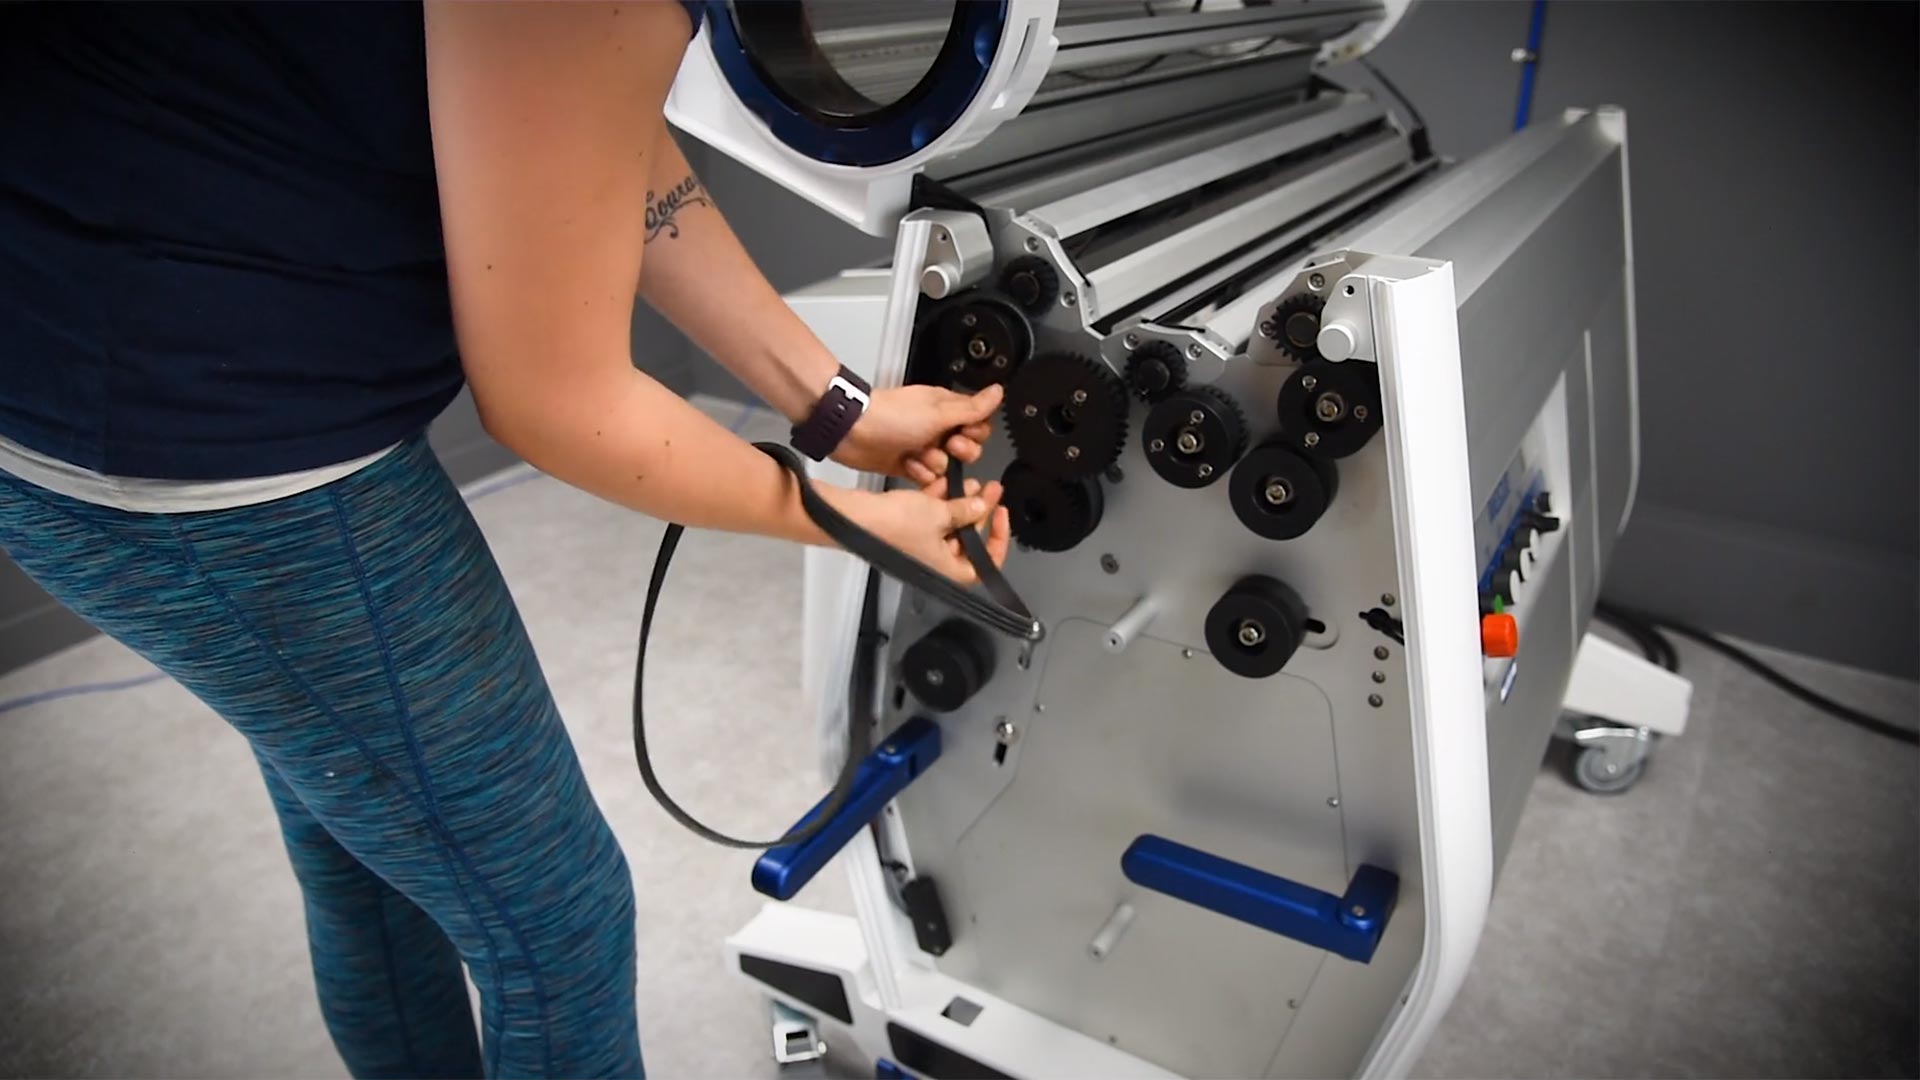
Now you'll be able to unwind the drive belt. If needed, have a coworker lift up on the motor gear to relieve tension.
04
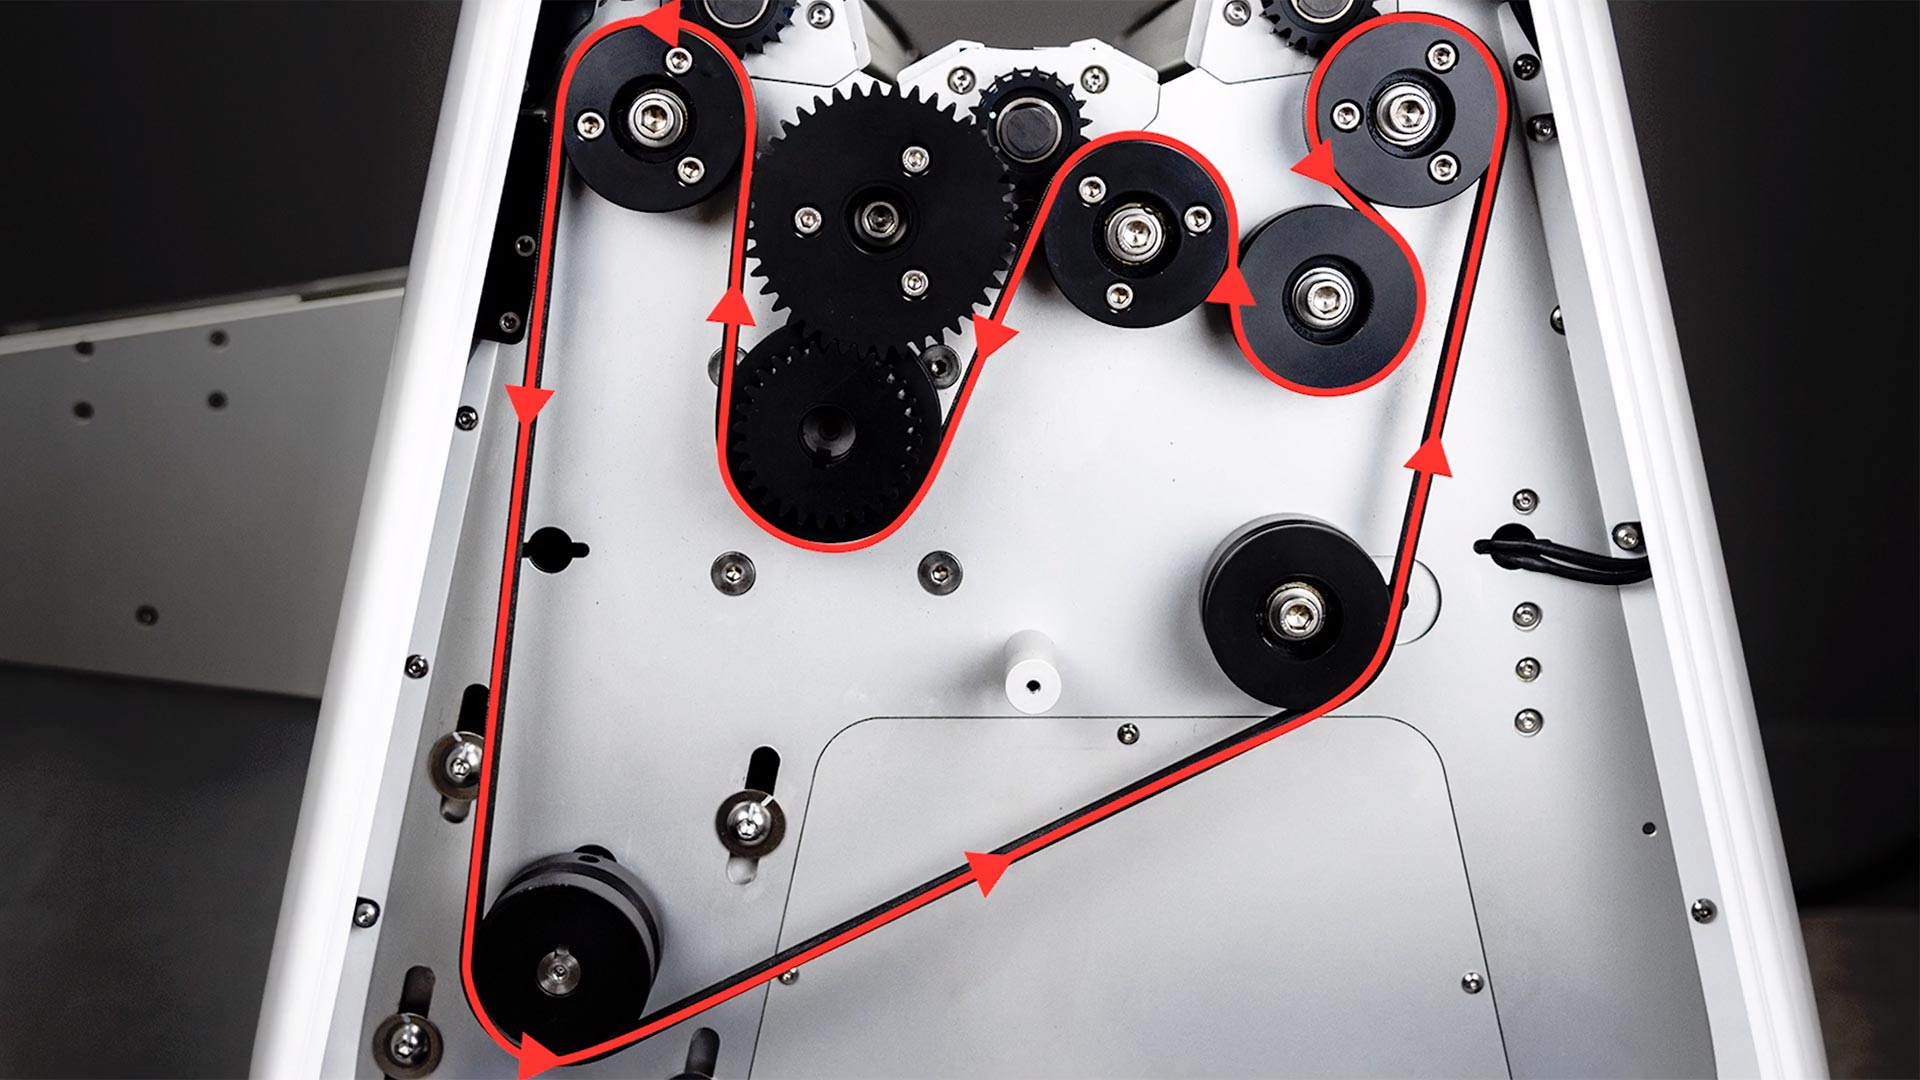
Take your new belt, and wind it back through the various gears, following the path outlined in this graphic. This graphic is also available as a printable PDF. You might want to print it out and have it on hand in your trim room.
05
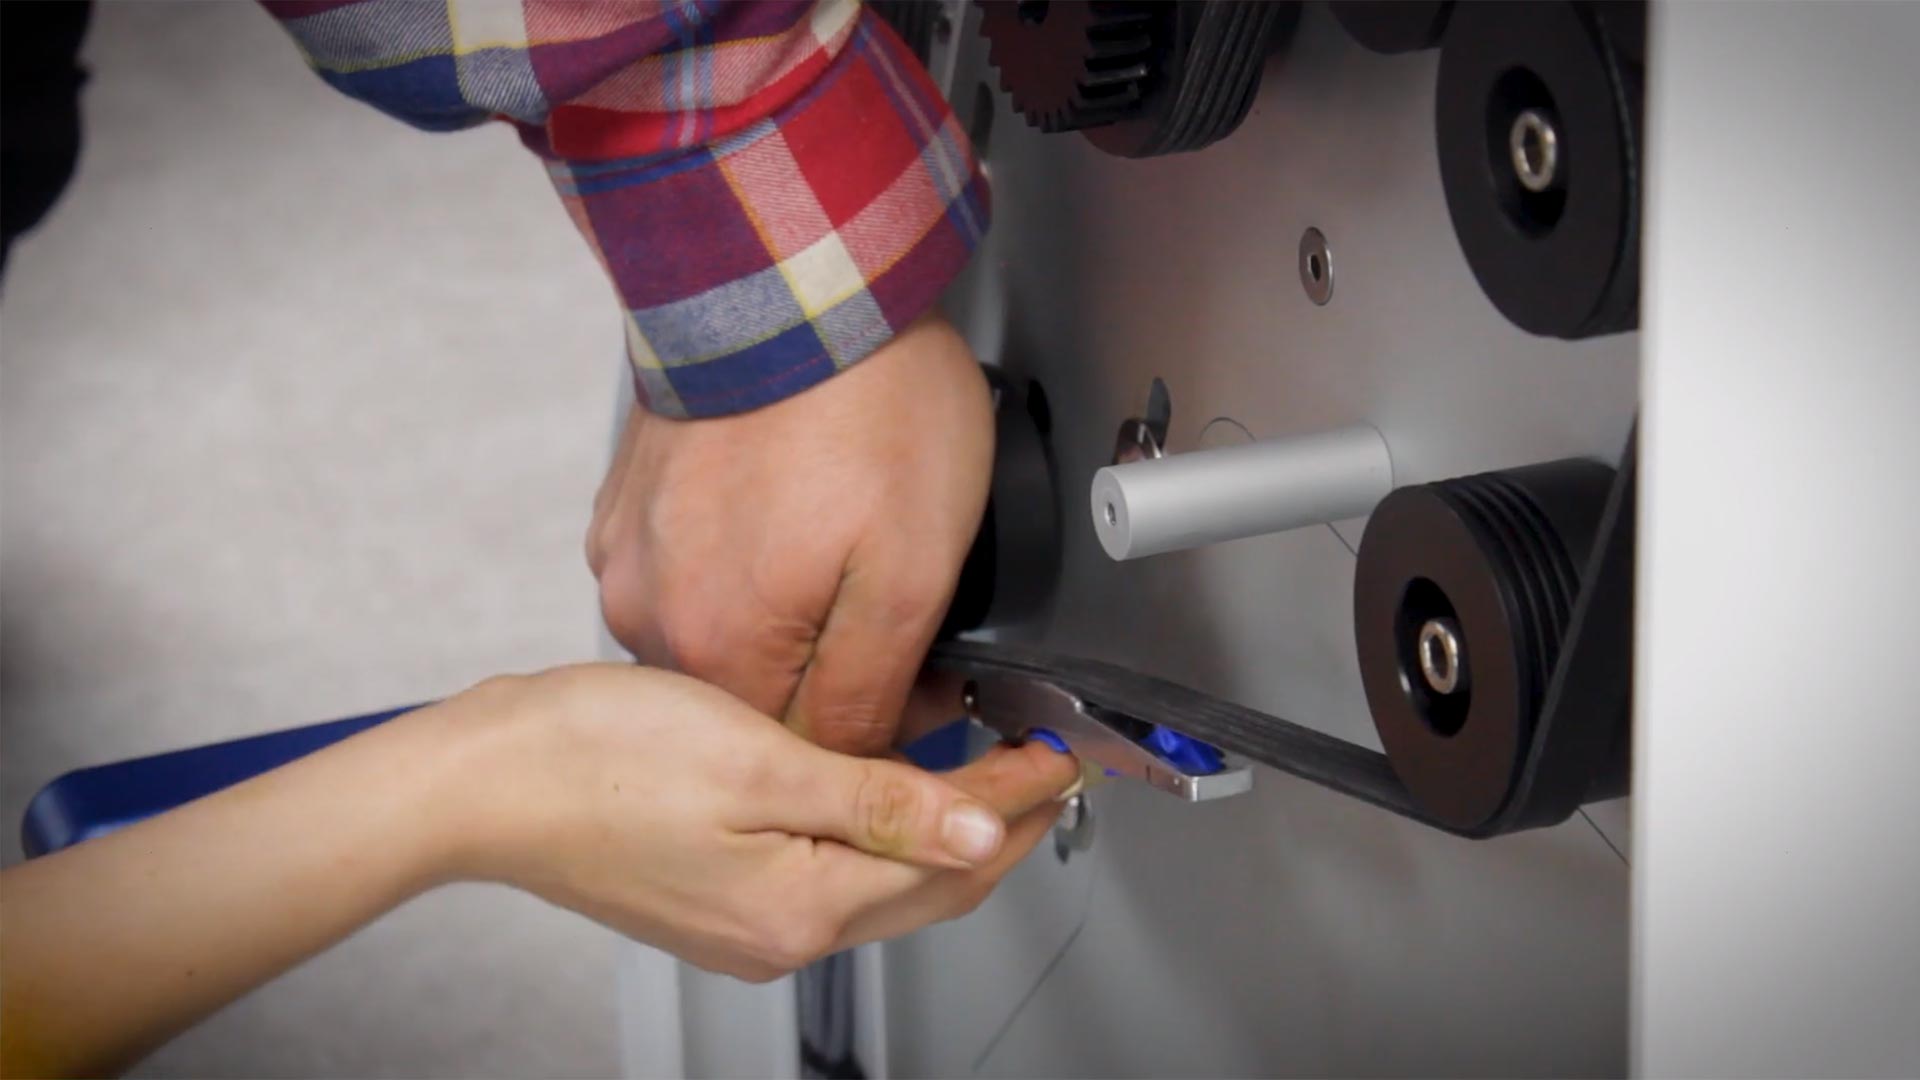
Have a coworker press down on the motor gear, while you check the belt tension. You want it to be at 10kg of tension.
06
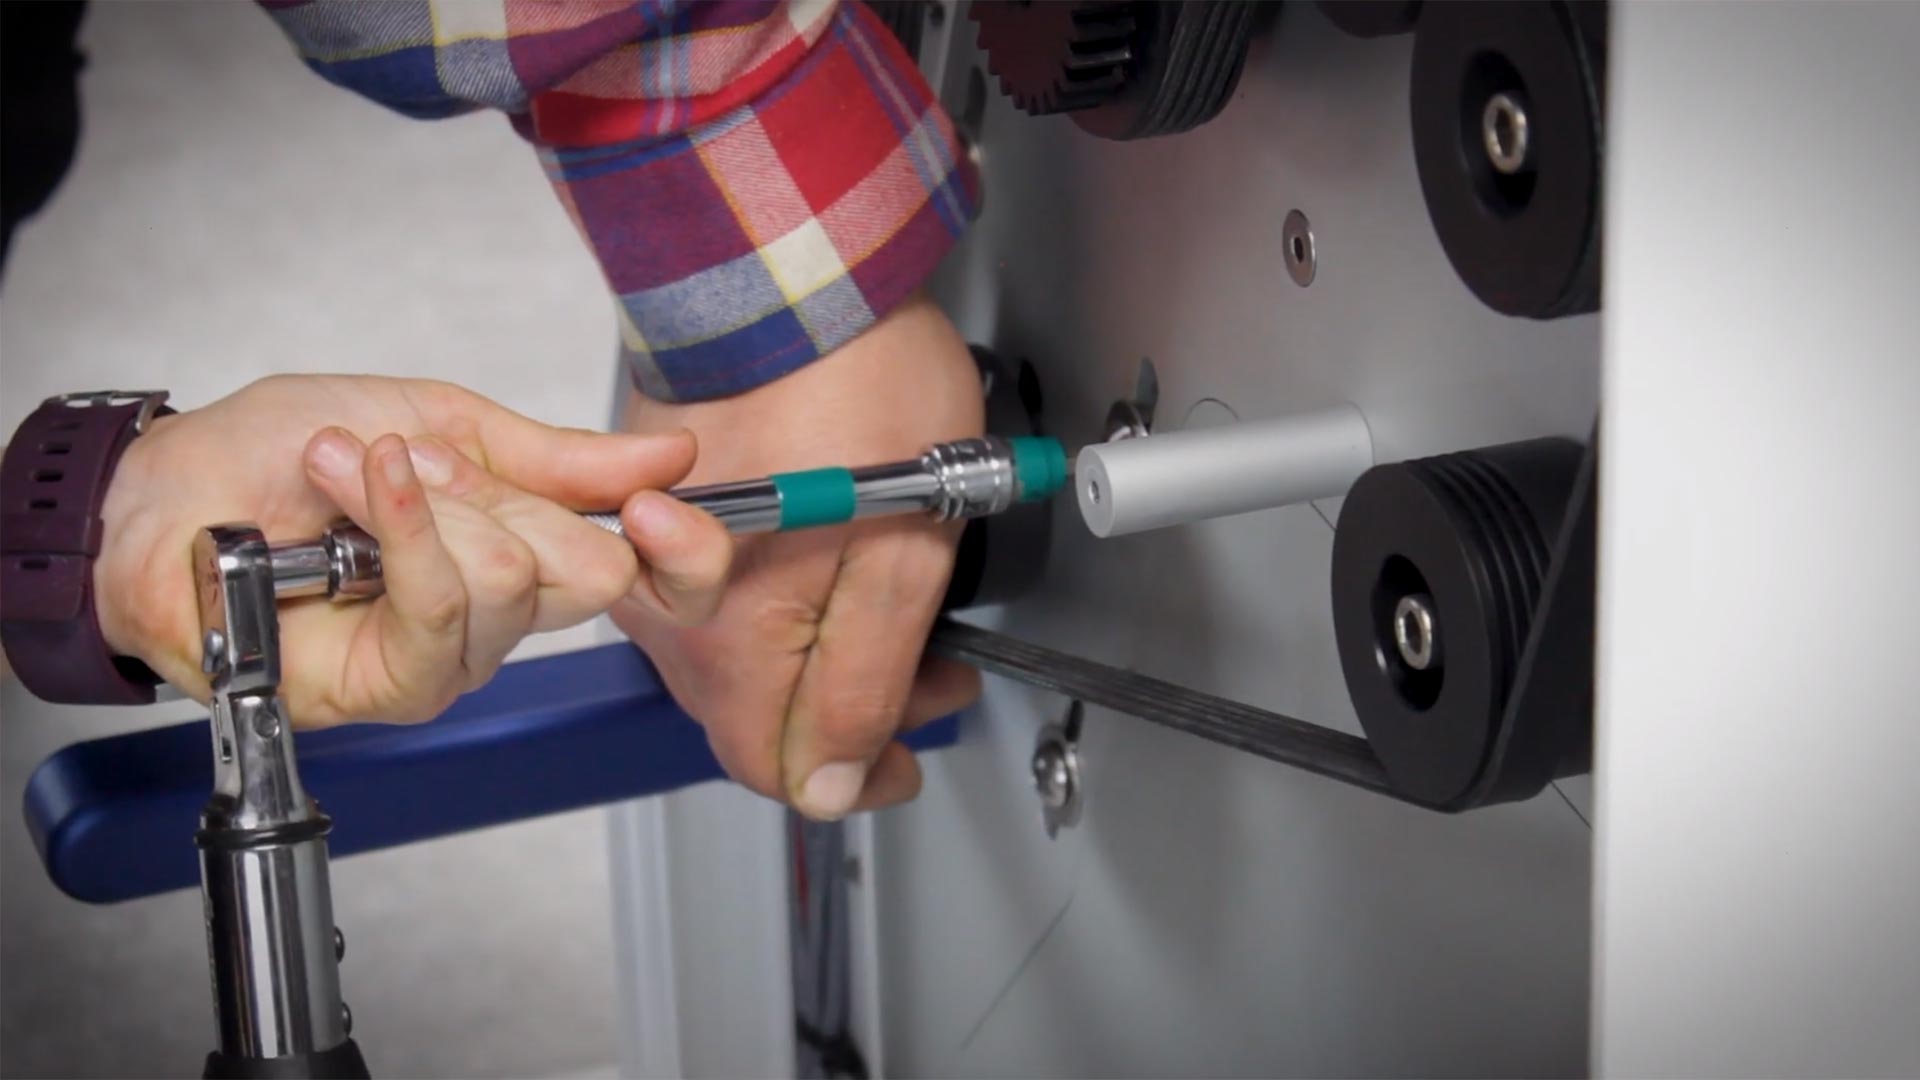
While they continue to press down, tighten the top right motor bolt to 16 foot pounds.
07
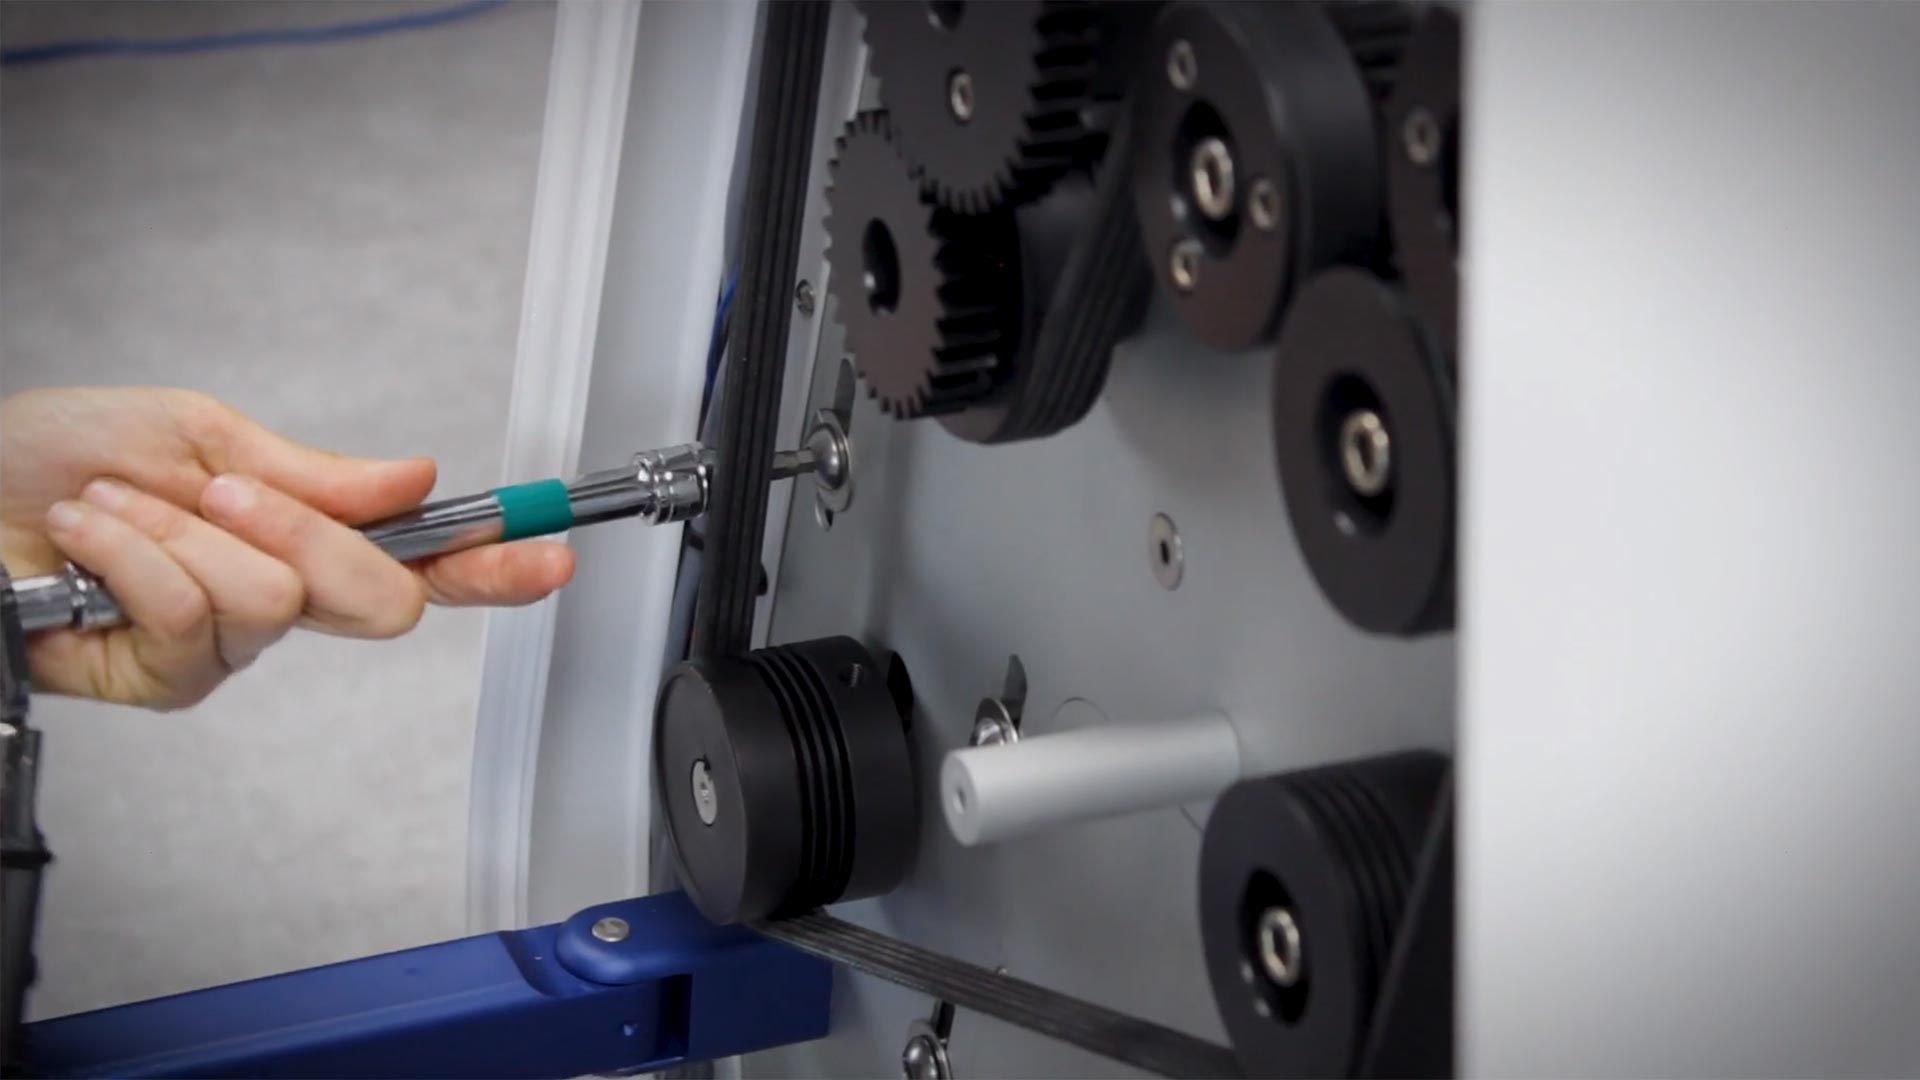
Your coworker can now let go of the motor gear. Continue to tighten the other three screws to 16 foot pounds.
YOUR NEW BELT IS NOW IN PLACE, AND YOUR M108S IS READY TO GO BACK INTO OPERATION.

